Saeco Intelia Cappuccino Repair Service Tips
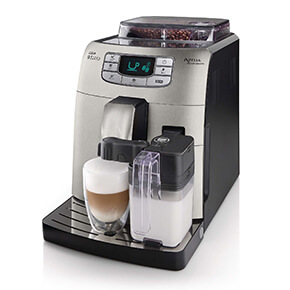
Saeco Intelia Cappuccino coffee machine
provides real Italian coffee experience with maximum convenience.
This machine is intended for household use.
Max coffee per day: 10 cups
Manual & Documentation
 User Manual
- PDF file
★ Do you need spare parts? ★
We have a huge range of replacement parts for your Saeco Intelia Cappuccino Coffee Maker.
Visit our online store here >
Guide to troubleshoot your Saeco Intelia Cappuccino Coffee Machine
Electricity related issues
- Not turning on
-
In case You can't or don't want to resolve the problem with the tips above, then the machine needs the attention of a professional.
Cable and cable fuse
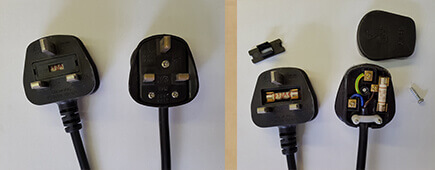
It is really rare for the fuse to go, but can happen in case of a shorted component.
Check the fuse in the plug. Make sure the plug is properly connected into the connector slot.
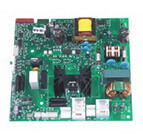
Electric panel
The problem might be casued by a faulty electric board, which is unfortunately rarely repairable.
- Not heating up
-
Unfortunately all possible causes need the attention of a professional.
Thermostat(s)
Some thermostats need to be reactivated after a possible overheating of the machine, while they can also go in case of an extreme overheating issue.
-thumb.jpg)
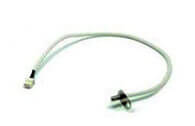
Temperature sensor
Although rarely, but the temperature sensor can cause this fault as well.
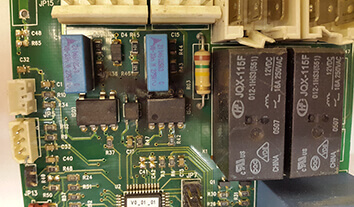
Electric board
Ocasionally faulty triacs and varistors can cause such a symptom.
- Burnt smell
- Unfortunately all possible causes need the attention of a professional.
- Lights / error messages
-
In case You can't or don't want to resolve the problem with the tips above, then the machine needs the attention of a professional.
Water droplet and round arrow
This sign means that there is no water flow in the system and is mainly caused by a blockage in the water system or the brew unit, or a misplaced water tank.
The machine will automatically let water through abd try to fill the water system to get rid of any airlock inside.
Crossed water droplet
The machine lets you know when the water level is low in the tank.
Fill the water tank.
Brew unit and cogs
This sign comes on after the grinding process and it won't start the coffee brewing process, then the brew unit is probably blocked.
Clean and lubricate brew unit.
Crossed coffee bean
If the sign appears in the middle of the grinding process, and the ground coffee gets thrown into the dump box without the coffee being brewed, then the coffee container is either empty or the grinder blades are blocked by wet or greasy coffee.
Fill the coffee beans container.
Clean and readjust grinder.
Wrench sign
This sign can indicate two things and You can determine the most likely one by observing when the light comes on. It might be on a few seconds after turning the machine on, indicating that there is no change in the boiler temperature, meaning that the machine is not heating. However, if the light comes on later as You press the coffee button, then the grinder is most likely blocked.
Clean and readjust grinder.
Brew unit , cogs and arrow
If You don't put the brew unit back with a firm movement, then it might not sit back correctly in place and as a result it would most likely not press the microswitch sensing its presence.
Make sure the brew unit is correctly in place.
U sign and arrow
The most common problem is spilled ground coffee under the brew unit and behind the dump box, making it impossible to put it back.
Check the dump box, it might not be correctly in place.
U sign with dots and arrow
The machine counts the number of coffees made since the last time the dump box was emptied and after about 10 coffees it will give the signal to empty it again. You also need to remember to empty the drip tray along with the dump box as well, because the tray has no separate sensor.
Empty the dump box.
Door sign
This sign indicates that the service door is not properly closed.
Make sure the service door is properly closed.
Filter sign
In case You use the water softener cartridges instead of descaling the machine, then You need to replace it if this sign comes up.
Replace the water softener cartridge.
Calc Clean sign
The machine measures the amount of water that ran through the system since the last time the signal was resetted, and depending on the water hardness level settings, it will give the signal again after the pre-programmed amount of water ran through the system again.
Descale the machine.
Water related issues
- Leaking
-
In case You can't or don't want to resolve the problem with the tips above, then the machine needs the attention of a professional.
Dirty water
This problem is mainly caused by ground coffee piling up underneath the brew unit, blocking the path of the excess water let out by the machine.
Clean and lubricate brew unit.
Clean the drainage vent behind the brew unit thoroughly.
Clear water
This is a clear sign of a leaking water system. We strongly advise to stop operating the machine as soon as You come across with this fault.
- Fill water tank
-
In case You can't or don't want to resolve the problem with the tips above, then the machine needs the attention of a professional.
Sensor issue
In case filling the water tank doesn't help, then the water level sensor might be faulty or might have fallen off of the inner wall of the water container compartment.
Fill the water tank.
- No water / coffee through the machine
-
In case You can't or don't want to resolve the problem with the tips above, then the machine needs the attention of a professional.
Airlock
This symptom is mostly accompanied by the flashing hot water (green) and triangle (red) sign, and means that the filling of the water system is required.
Fill the water tank and let water through the steam wand till you get a continuous flow.
Water working, but no coffee
In cases, where You can't get coffee out of the machine even though You get water through the steam wand, the most common cause is a blocked, dirty brew unit.
Clean and lubricate brew unit.
- Not steaming
- In case You can't or don't want to resolve the problem with the tips above, then the machine needs the attention of a professional.
Brew unit related issues
- Brew unit blocked
-
In case You can't or don't want to resolve the problem with the tips above, then the machine needs the attention of a professional.
Brew unit is clogged up
The brew unit is the heart of the machine and it is recommended to be cleaned once a week under running water.
Clean and lubricate brew unit.
Brew unit stuck
This mainly happens when the user tries to force the brew unit out without reseting it to neutral position.
- Can't replace the brew unit
-
In case You can't or don't want to resolve the problem with the tips above, then the machine needs the attention of a professional.
Gears are not aligned
This fault mainly occurs when the user removes the dump box and/or the brew unit before the machine could reset itself to neutral position.
Put the brew unit aside and everything else back to their places, close the service door and turn the machine off and then on, wait till the machine stands completely still and you should be able to replace the brew unit.
- Unusual noises from the brew unit
-
In case You can't or don't want to resolve the problem with the tips above, then the machine needs the attention of a professional.
Clicking / cracking sound
Mostly a sound generated by the brew unit and it is a sign of the lack of lubrication.
Clean and lubricate brew unit.
Gearbox damaged
In extreme cases, the lack of lubrication can even lead to overexerting and damaging the gearbox.
- Slow brew unit operation
-
In case You can't or don't want to resolve the problem with the tips above, then the machine needs the attention of a professional.
Brew unit clogged up
The fault might simply originate from the lack of maintenance, caused by piled up ground coffee blocking the operation of the brew unit.
Clean and lubricate brew unit.
Ground coffee related issues
- Puck consistence
-
In case You can't or don't want to resolve the problem with the tips above, then the machine needs the attention of a professional.
Pucks are falling apart
The ground coffee can't stay together as a puck if it's too coarse or the quantity of ground coffee is too low. The quantity can only be influenced by the smoothness of the brew unit movement.
Readjust the grinder to grind finer.
Clean and lubricate brew unit.
Pucks are muddy
If the brew unit is not cleaned and lubricated, thus moves sluggishly, then the CPU will think that it's struggling to compress the coffee, so it will decrease the ground coffee quantity.
Readjust the grinder to grind coarser.
Clean and lubricate brew unit.
- Unused coffee in waste
-
In case You can't or don't want to resolve the problem with the tips above, then the machine needs the attention of a professional.
Ocasionally
The grinder might be clogged up or the beans You use might be a bit too oily.
Clean and readjust grinder
Try different beans.
Frequently
The problem is most likely with the beans You use. They might be too oily or too big for the grinder to properly work with.
Try different beans.
- Water in dump box
-
In case You can't or don't want to resolve the problem with the tips above, then the machine needs the attention of a professional.
Clean water
Clean water mostly gets in the dump box in larger quantities if the brew unit is not properly cleaned.
Clean and lubricate brew unit.
Coffee
In case coffee ends up in the dump box, that means that either the brew unit, or the connection between the brew unit and the machine is damaged.
- Spilled ground coffee
-
In case You can't or don't want to resolve the problem with the tips above, then the machine needs the attention of a professional.
Small amount
All automatic machines spill some ground coffee around the brew unit. You need to clean and lubricate the brew unit on a regular basis to keep the machine running and clean.
Clean and lubricate brew unit.
Large amount
This maily occurs because of the brew unit as symptom of the lack of lubrication, resulting in a desorted ground coffee quantity data.
Clean and lubricate brew unit
Clean and readjust grinder.
- Not grinding coffee
-
In case You can't or don't want to resolve the problem with the tips above, then the machine needs the attention of a professional.
Grinder operating, but not grinding the beans
In the vast majority of the cases this symptom is caused by either some kind of liquid that was poured into the grinder or greasy coffee beans. Both result in ground coffee stuck to the blades making them unable to grind the coffee.
Clean and readjust grinder.
Grinder does not operate
The grinder is either blocked by some foreign object or the motor might be worn out or faulty.
Clean and readjust grinder.
End product related issues
- Coffee dripping
-
In case You can't or don't want to resolve the problem with the tips above, then the machine needs the attention of a professional.
Brew unit clogged up
A possible problem is that the shower disc is blocked by coffee residue.
Clean and lubricate brew unit.
The ground coffee is too fine
The grinder fineness settings might be too fine and water can't pass through the ground coffee, or the ground coffee is so fine, that it can block the shower disc.
Readjust the grinder to grind coarser.
Set the ground coffee quantity lower.
- Coffee is running through and comes out weak
-
In case You can't or don't want to resolve the problem with the tips above, then the machine needs the attention of a professional.
The ground coffee is too coarse
The blades might be damaged or, as impossible as it may sound, worn out. Yes. These ceramic blades can wear out too, but only after a much longer period than the normal, metal ones.
Readjust the grinder to grind finer.
Wrong beans
The beans might be stale or the percentage of arabica beans in the blend might be too high. For these machines we reccomend at least 40% robusta percentage.
Try different beans.
- Coffee temperature
-
In case You can't or don't want to resolve the problem with the tips above, then the machine needs the attention of a professional.
Too high
The temperature might be too high in case the system has a larger amount of limescale built up inside.
Descale the machine.
Lukewarm
Oddly enough in most cases this issue is not related to the machine at all. It is rather related to the cold mug or cup the user brews the coffee into.
Pre-heat the cup before brewing coffee.
Cold
This is a rare issue, mainly caused by a faulty temperature sensor.
- Coffee consistence
-
In case You can't or don't want to resolve the problem with the tips above, then the machine needs the attention of a professional.
Weak
The strength of the coffee is influenced by the coffee blend, the ground coffee fineness and quantity, the temperature and the pressure. A weak coffee might be the result of stale beans or too high arabica percentage, coarse ground coffee, low ground coffee quantity, low temperature, or a combination of these.
Readjust the grinder to grind finer.
Try different beans.
Strong or sour
The strength of the coffee is influenced by the coffee blend, the ground coffee fineness and quantity, the temperature and the pressure. A strong coffee might be the result of high robusta percentage, fine ground coffee, high ground coffee quantity, high temperature, or a combination of these.
Readjust the grinder to grind coarser.
Try different beans.
There is no crema on top
In the world of automatic machines the theme crema will be somewhat simplified because of the low number of factors the user can influence and the low precision value of these adjustments. Basically there are three adjustable factors that have the most influence on the crema in a correctly operating automatic machine. These three factors are the coffee beans, the grinding fineness and the ground coffee quantity. The higher robusta percentage, the finer the ground coffee and the higher the coffee quantity is, the thicker the crema will turn out to be.
Readjust the grinder to grind finer.
Set the ground coffee quantity higher.
Try different beans.
- Milk froth consistence
-
In case You can't or don't want to resolve the problem with the tips above, then the machine needs the attention of a professional.
Milk warms up, but is not froted
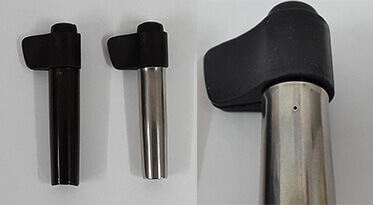
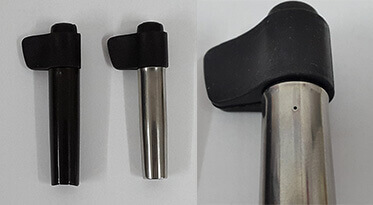
If You have steam pressure, but the milk is not frothed, then the problem can only be with the frother device. The most common problem is that the frother is not perfectly clean. You need to make sure to keep the small hole on the side of the frother attachment clear.
Clean the frother attachment and steam wand.
Descale the machine.
