Saeco Nina Repair Service Tips
Saeco Nina coffee machine
Manual & Documentation
★ Do you need spare parts? ★
We have a huge range of replacement parts for your Saeco Nina Coffee Maker.
Visit our online store here >
Guide to troubleshoot your Saeco Nina Coffee Machine
Electricity related issues
- Not turning on
-
In case You can't or don't want to resolve the problem with the tips above, then the machine needs the attention of a professional.
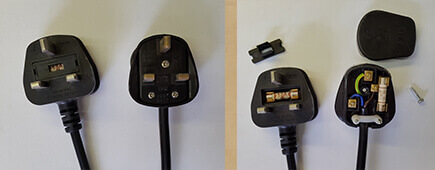
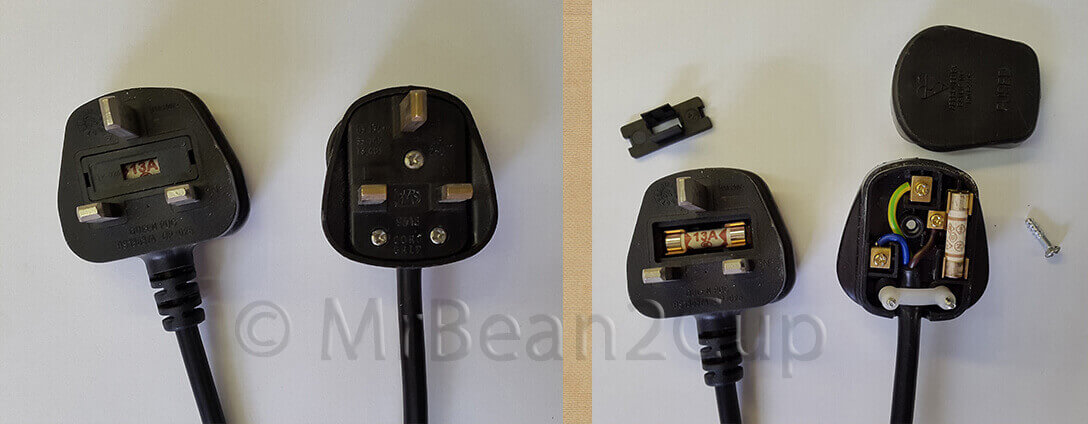
Cable and cable fuse
It is really rare for the fuse to go, but can happen in case of a shorted component.
Check the fuse in the plug. Make sure the plug is properly connected into the connector slot.
Safety thermostat
The problem is mostly casued by a faulty safety thermstat.
Main switch
A relatively rare cause is a faulty main switch.
- Not heating up
-
Unfortunately all possible causes need the attention of a professional.
Thermostat(s)
In case the machine gives the "ready to use" signal straight after turning it on, or choosing the steam function, then the most likely cause is the temperature switch of the chosen function.
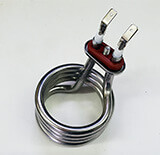
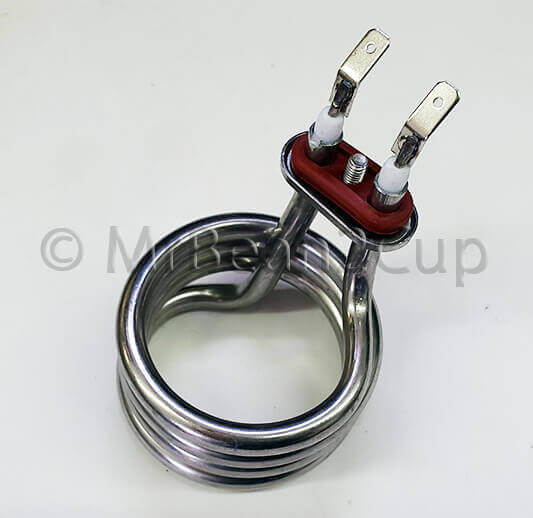
Heating element
On some occasions the heating element fails and causes the heating problem.
- Tripping the RCD
-
Unfortunately all possible causes need the attention of a professional.
Thermostat(s)
Ocasionally the thermostats can be fauly and cause the shorting in the machine.
Heating element
The most common cause is a soaked heating element. This mainly happens because of inner leaks in the machine.
- Burnt smell
-
Unfortunately all possible causes need the attention of a professional.
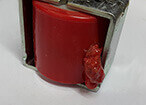
Burnt water pump
The main suspect in case of burnt smell is the coil of the weter pump.

Water related issues
- Leaking
-
In case You can't or don't want to resolve the problem with the tips above, then the machine needs the attention of a professional.
From the side of the coffee holder
This mainly occurs if the brew group is dirty or the group gasket is worn out, or if the filterholder locking ring is damaged.
Dismantle and clean the brew group thoroughly.
Replace the group gasket.
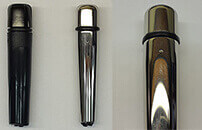
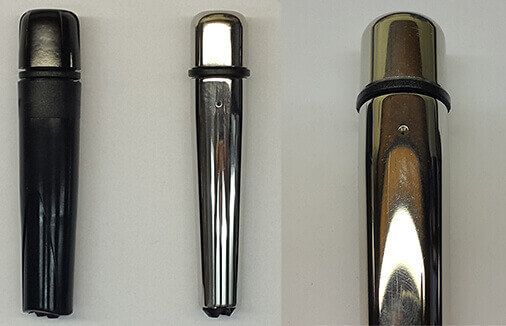
Steam valve
The dripping of the steam wand is a common problem with these machines unfortunately.
Remove the steam knob and use a pair of pliers to grab the shaft of the steam valve and tighten it a bit more than what the knob would allow You to, thereby embedding the shaft into the sealing counter part. Open and close it a few times and it should work much better according to our experiences, however we can't promise it will definitely help, but unfortunately we couldn't promise that buying a new valve would help either.
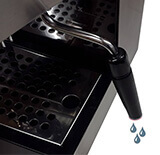
Brew group dripping
The most common leaking issue is the constant dripping of the brew group, which can be caused by limescale piling up on the group valve or by a worn out group valve.
Dismantle and clean the brew group thoroughly.
Replace the part if deemed necessary.
From inside
If You notice a leak from the inside of the machine, then You must unplug the machine straight away.
- Low pressure
-
In case You can't or don't want to resolve the problem with the tips above, then the machine needs the attention of a professional.
Coffee only
If You experience low water pressure when making coffee, then it is either a sign of the lack of maintenance, or the filter basket is blocked, or the pump is faulty.
Dismantle and clean the brew group thoroughly.
Clean the filter basket.
Water and coffee
In case You experience low pressure from both the steam wand and the brew group, then the most likely cause is limescale in the water system, or a faulty pump.
- No water / coffee through the machine
-
In case You can't or don't want to resolve the problem with the tips above, then the machine needs the attention of a professional.
No water
In most cases this symptom is simply caused by an airlock in the water system.
Fill the water tank and let water through the steam wand till you get a continuous flow. You can do so by opening the steam knob and pressing the coffee button.
Water working, but no coffee
In case You get water through the steam wand, but not through the brew group, then the group valve is most likely blocked.
Dismantle and clean the brew group thoroughly.
Try removing the group valve and reach into the pipe above the vale with a piece of wire to clear any residue that might be blocking it. You need to keep in mind that the residue blocking the pipe came from the boiler, so You will keep getting the same problem over and over again, unless You clean the boiler as well.
- Not steaming
-
In case You can't or don't want to resolve the problem with the tips above, then the machine needs the attention of a professional.
Frother blocked
You need to keep in mind, that all frothers need to be cleaned straight away after use, otherwise milk residue will build up and block the steam wand and frother.
Clean the frother attachment and steam wand.
Thermostat
If the machine is not producing steam or the pressure is not enough, then the termostat might be faulty.

Brew group related issues
- Brew group blocked
-
In case You can't or don't want to resolve the problem with the tips above, then the machine needs the attention of a professional.
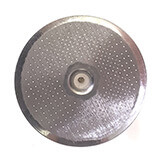
Shower disc
If You don't regularly clean the brew group of Your machine, then the shower disc will get blocked relatively quickly.
Dismantle and clean the brew group thoroughly.
Group valve
By far the most common cause of a blockage in the brew group is the blockage of the group valve.
Dismantle and clean the brew group thoroughly.
Try removing the group valve and reach into the pipe above the vale with a piece of wire to clear any residue that might be blocking it. You need to keep in mind that the residue blocking the pipe came from the boiler, so You will keep getting the same problem over and over again, unless You clean the boiler as well.
Replace the part if deemed necessary.
Pipe
Although the blockage of the pipe above the group valve is a fairly rare occurance, You still need to keep in mind, that there is the possibility of it happening.
Try removing the group valve and reach into the pipe above the vale with a piece of wire to clear any residue that might be blocking it. You need to keep in mind that the residue blocking the pipe came from the boiler, so You will keep getting the same problem over and over again, unless You clean the boiler as well.
- Brew group leaking
-
In case You can't or don't want to resolve the problem with the tips above, then the machine needs the attention of a professional.
Worn out group gasket
If You're experiencing water leaking on the side of the filter holder, then the group gasket is most likely worn out or damaged.
Dismantle and clean the brew group thoroughly.
Replace the group gasket.

Group valve
The leaking can be caused by limescale piling up on the group valve or by a worn out group valve.
Dismantle and clean the brew group thoroughly.
Try removing the group valve and reach into the pipe above the vale with a piece of wire to clear any residue that might be blocking it. You need to keep in mind that the residue blocking the pipe came from the boiler, so You will keep getting the same problem over and over again, unless You clean the boiler as well.
Replace the part if deemed necessary.
Boiler leaking
In case the leaking comes down the side of the brew group, then there is an inner leak, most likely from the boiler gasket.
- Can't dismantle the brew group
-
In case You can't or don't want to resolve the problem with the tips above, then the machine needs the attention of a professional.
Limescale
If You can't dismantle the brew group, then You probably don't clean it frequently enough and the screws got stuck because of limescale and coffee residue that built up over time.
Dismantle and clean the brew group thoroughly.
Try knocking on the screw(s) with a hammer a few times. Don't be too forceful.

End product related issues
- Coffee dripping
-
In case You can't or don't want to resolve the problem with the tips above, then the machine needs the attention of a professional.
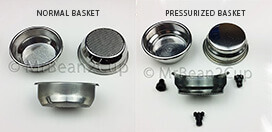
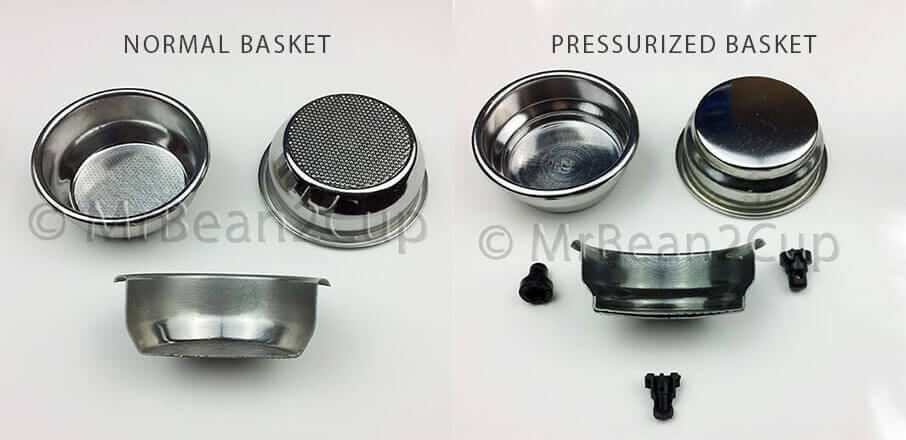
The filter basket is clogged up
In case You have a pressurized (double layer) filter basket, You need to make sure to empty and rinse it after each time You use it, otherwise it will get blocked by the coffee residue between the two layers and You won't be able to clean it. However, if You have a normal basket, then You can use a brass wire brush to clean it and it should be as good as new.
Clean the filter basket.
Replace the part if deemed necessary.
The ground coffee is too fine
If the ground coffee You use is too fine or You have tamped the coffee too hard, then the pump might not be able to press water through the puck.
If You have a grinder, then readjust it to grind coarser, or if You don't have one, then buy coarser ground coffee.
The pump is faulty
Experiencing pressure problems while making coffee can also be a sign of a faulty water pump.
- Coffee is running through and comes out weak
-
In case You can't or don't want to resolve the problem with the tips above, then the machine needs the attention of a professional.
The filter basket is damaged
Even a normal filter basket can wear out, although only after numerous years, or in case You cleaned the basket with a pin, You might have widened its holes, which results in faster coffee flow and weak coffee.
Replace the part if deemed necessary.
The ground coffee is too coarse
If the ground coffee You use is too coarse, then even a tamper won't help You to get a healthy coffee flow.
If You have a grinder, then readjust it to grind finer, or if You don't have one, then buy finer ground coffee.
The coffee is burnt
You need to be wary of attaching the coffee holder with coffee too soon to the machine. If You leave it on for long, then the coffee will get burnt and will ruin the flow and the tase.
Attach the coffee holder with coffee only after the machine has reached the operating temperature. If You wish to preheat the coffee holder, then attach it only without coffee.
- Coffee temperature
-
In case You can't or don't want to resolve the problem with the tips above, then the machine needs the attention of a professional.
Too high
The most common cause for a temperature rise is limescale.
Descale the machine.
Lukewarm
Oddly enough in most cases this issue is not related to the machine at all. It is rather related to the cold coffee holder and mug or cup the user brews the coffee into.
Pre-heat the cup and the coffee holder before brewing coffee. The coffee holder can be preheated by attaching it to the machine without coffee while the machine is heating. You can also let hot water through it before putting coffee into it.
Cold
In case the machine gives the "ready to use" signal straight after turning it on and the water is completely cold, then the most likely cause is the temperature switch.
- Coffee consistence
-
In case You can't or don't want to resolve the problem with the tips above, then the machine needs the attention of a professional.
Weak
The strength of the coffee is influenced by the coffee blend, the ground coffee fineness and quantity, the temperature and the pressure. A weak coffee might be the result of stale beans or too high arabica percentage, coarse ground coffee, low ground coffee quantity, low temperature, or a combination of these.
If You have a grinder, then readjust it to grind finer, or if You don't have one, then buy finer ground coffee.
Try a different coffee blend.
Strong, sour
The strength of the coffee is influenced by the coffee blend, the ground coffee fineness and quantity, the temperature and the pressure. A strong coffee might be the result of high robusta percentage, fine ground coffee, high ground coffee quantity, high temperature, or a combination of these.
If You have a grinder, then readjust it to grind coarser, or if You don't have one, then buy coarser ground coffee.
Try a different coffee blend.
There is no crema on top
In this category of manual machines the theme crema will be somewhat simplified because of the low number of factors the user can influence. Basically there are three factors that have the most influence on the crema in a correctly operating machine. These three factors are the coffee beans, the grinding fineness and the ground coffee quantity. The higher robusta percentage, the finer the ground coffee and the higher the coffee quantity is, the thicker the crema will turn out to be.
If You have a grinder, then readjust it to grind finer, or if You don't have one, then buy finer ground coffee.
Try a different coffee blend.
Coffee spraying all over the machine
This is caused by a missing part called "Crema Filter Pin" or "Frothing Jet Device" in 99% of the cases. This part comes with the pressurized filter baskets and diverts the coffee coming out at a high pressure from the single hole of the pressurized basket, and in case it's missing, the coffee sprays straigh out the spout.
Replace the filter pin underneath the filter basket.
- Milk froth consistence
-
In case You can't or don't want to resolve the problem with the tips above, then the machine needs the attention of a professional.
Milk warms up but is not froted
If You have steam pressure, but the milk is not frothed, then the problem can only be with the frother device. The most common problem is that the frother is not perfectly clean.
Clean the frother attachment and steam wand.
Descale the machine.

